Most developers treat Copilot Chat like a smarter search box. Type a question, get an answer, move on. The engineers extracting real leverage do something different: they think architecturally about how VS Code assembles the prompt before the model ever sees their message. The Copilot Chat extension is open source—inspecting how it builds the context window is a practical first step.
Three features sit at the center: Custom Instructions, Prompt Files, and Custom Agents. Everyone knows they exist. Few understands where each lands inside the Context Window—or why that placement matters.
That distinction is the difference between wrestling with an AI and conducting one.
When the prompt stack is unclear, the model has to guess what matters. Architecture fixes that.
The Context Window Is an Architecture Problem
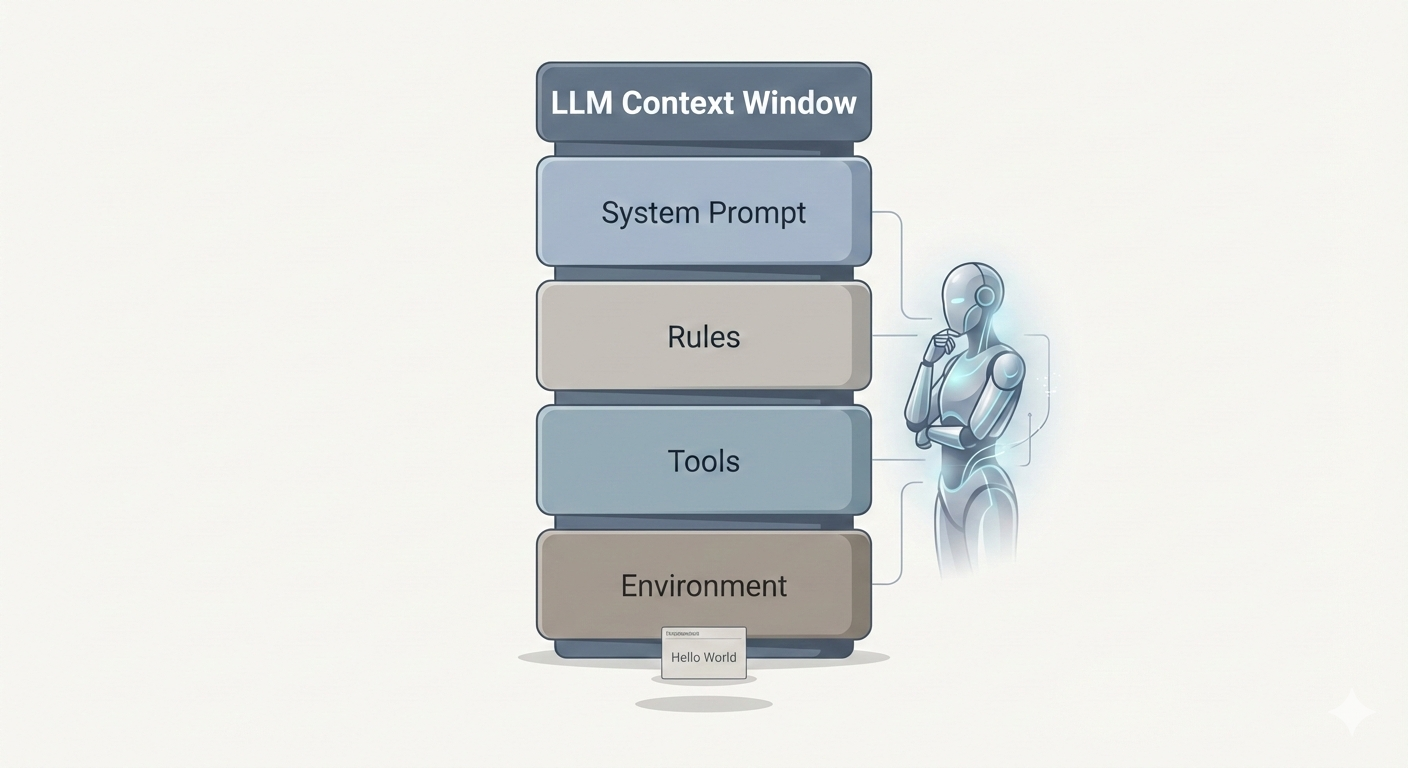
Before touching the customization tools, you need to see what happens behind the scenes when you press Enter in Copilot Chat. VS Code doesn’t just forward your message to the model. It constructs a layered prompt—a stack of contexts assembled in a deliberate order.

How VS Code assembles the prompt: system and user layers merge into one processing step, then the response.
The System Prompt forms the foundation—AI identity, behavioral rules, tool instructions, output formatting. This is the bedrock the model builds every response on, and you don’t control most of it.
The User Prompt is where your voice enters. But before your actual words, VS Code injects environment metadata (your OS, workspace structure, open files), the conversation history, and any prompt file you’ve activated.
Your message arrives last—at the bottom of this entire assembled stack.
The critical insight: The more content packed into the context window, the less effectively the model focuses on what matters. Research shows that accuracy degrades in long conversations—a phenomenon called Context Rot. Every token is real estate; most people fill it with clutter.
Where Each Tool Lives—And Why It Matters
Knowing what these tools do is table stakes. Knowing where they’re injected in the prompt stack is what gives you leverage.

Where each tool lives: system prompt (orange = yours) and user prompt (purple = prompt file; grey = context and your message).
| Tool | Placement | Best for |
|---|---|---|
| Custom Instructions | End of System Prompt | Project architecture, coding standards, universal constraints |
| Prompt Files | Top of User Prompt | Repeatable tasks, model-switching, team-shared templates |
| Custom Agents | Very end of System Prompt | Specialized phases: planning, review, implementation |
Custom Instructions — The Constitution
These provide high-level, persistent context about your project: architecture patterns, coding standards, constraints. Things that should shape every response.
Placement: End of the System Prompt, before any agent override.
Because they live in the system prompt, they establish foundational context before any conversation begins. Multiple instruction files stack together—your project-specific rules loading alongside Copilot’s own guidelines. Think of them as the constitution of your AI-assisted workspace. They don’t execute anything; they constrain everything.
Best for: Project architecture definitions, preferred patterns, coding standards that apply universally.
Prompt Files — The Playbook
Reusable prompt templates stored in your project. The underappreciated detail: you can configure them with front matter to specify which model to use.
Placement: Top of the User Prompt, before environment context and your actual message.
This is what makes them powerful. A prompt file can switch models dynamically—route a planning task to a premium model, a refactoring job to a faster one. Your team can share them like any other project artifact. They’re version-controlled, reviewable, repeatable.
Best for: Repeatable tasks, model-switching workflows, standardized prompts your team shares.
Custom Agents — The Role
Previously called “Custom Modes,” these override the default agent behavior to impose a specific persona or workflow. A “Plan Mode” agent. A “Review Mode” agent. A “Ship It” agent.
Placement: The very end of the System Prompt—after Custom Instructions. They get the final word before processing begins.
If Custom Instructions are the rules, the Custom Agent is the role that enforces them. Agents define identity, workflows, and available tools. They can restrict the agent from writing files (plan-only mode) or force it to always run tests before committing.
Best for: Specialized workflow phases—planning, code review, implementation, documentation.
An Agentic Workflow That Actually Works
Here’s where theory becomes leverage. The key insight: different phases of development require different levels of AI capability. Planning demands reasoning depth. Implementation demands speed and consistency. Treating them identically is waste.

Plan with a premium model, generate the blueprint, then execute with an efficient agent.
Phase 1 — Plan (Premium Model)
Use a Prompt File configured for a powerful model (e.g. a premium option available in Copilot). Have it analyze your codebase and generate a structured plan—small, testable steps, essentially a commit-by-commit roadmap. This is where reasoning depth matters; use the best model you can afford.
Phase 2 — Generate (Premium Model)
Use another Prompt File to turn that plan into a comprehensive markdown document with all the code for each step. You’re not asking it to edit files directly—you’re asking it to produce the full implementation blueprint while the reasoning model is still engaged.
Phase 3 — Execute (Efficient Model)
Clear the context window and start fresh. Activate a Custom Agent configured with a faster, cost-effective model. Feed it the markdown blueprint. The agent’s job is mechanical: implement the code step-by-step as written, run tests, report results.
Implement. Test. Commit. Next step.
This approach concentrates premium model spend where reasoning matters—planning and code generation—and uses efficient models for mechanical work. You get the analytical power where it counts at a fraction of the cost of running a premium model end-to-end.
Principles for Disciplined AI-Assisted Development
These aren’t tips. They’re constraints that separate productive AI workflows from expensive ones.
Know your tool before you reach for it.
Are you setting project context (Custom Instructions), running a templated task (Prompt File), or changing the agent’s mode (Custom Agent)? If you can’t answer before opening Chat, you’re prompting by accident.Treat every token as real estate.
Context Rot is real. Avoid redundancy, start fresh when conversations grow long, and keep instruction files concise. The best instruction file is the shortest one that still constrains the model correctly.Match model to task.
Premium models for analysis and planning; efficient models for implementation and iteration. Using a top-tier model to rename a variable is like hiring an architect to move a chair.Iterate in small, testable steps.
Verify each output before moving on. Skip verification once and you compound risk across every subsequent step.Maintain your configuration.
Instruction files, prompt files, and agents are living artifacts. Review them regularly, delete what’s obsolete, and keep them aligned with the project you have now—not three months ago.Stand on the shoulders of the community.
The Copilot Chat extension source and the Awesome Copilot repository collect community prompt files, instructions, and agents. Start there before building from scratch.
Getting superior results from Copilot isn’t about prompt magic—it’s about architectural knowledge and workflow integration.
Stop using it as a search bar and start building around it like an engineer.